Chamberlain garage door openers are known for their advanced features and long-lasting performance, making them a go-to choice for homeowners seeking convenience and security. Knowing how to wire a Chamberlain garage door opener correctly can save you from relying on costly professional help. This comprehensive guide will walk you through the process, ensuring you can install and troubleshoot your opener like an expert.
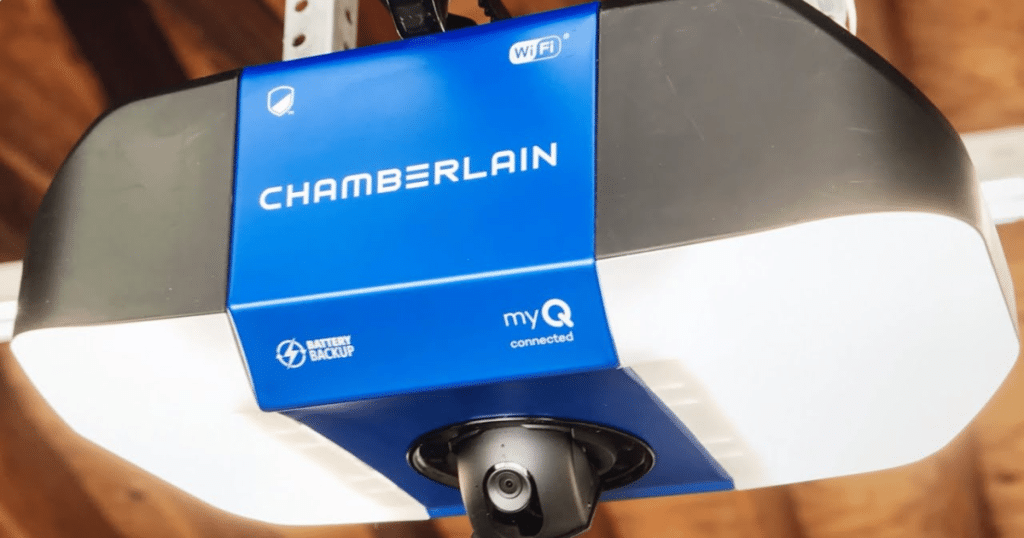
Garage door openers are vital for modern homes, offering security, ease of use, and improved functionality. Chamberlain’s models, with features like smartphone integration and quiet operation, make a significant difference in daily life. In this guide, we will cover everything you need to wire your opener correctly, ensuring optimal operation and longevity for your system.
Essential Tools and Materials for Wiring a Chamberlain Garage Door Opener
Collect all the required tools and materials before wiring your Chamberlain garage door opener to ensure a quick and effective installation process. Having everything ready will prevent delays and make the process easier. Here’s a checklist of what you will need:
Tools
- Screwdrivers: Flathead and Phillips for various screws.
- Wire Strippers: To remove wire insulation cleanly.
- Drill and Bits: For securing the opener to the ceiling or wall.
- Tape Measure: For accurate measurements and alignment.
- Stepladder: To reach high areas for opener and sensor installation.
- Level: Ensures proper alignment to avoid operational issues.
- Pliers: For manipulating and bending wires.
- Socket Wrench Set: To tighten nuts and bolts.
Materials
- Wiring Kit: Includes wires and connectors for the opener.
- Mounting Hardware: Brackets and fasteners for securing the opener.
- Electrical Tape: For insulating wire connections.
- Safety Glasses and Gloves: Protects from debris and ensures a secure grip.
Preparing these tools and materials will set you up for success, making the installation of your Chamberlain garage door opener efficient and hassle-free. With everything in place, you’re ready to get started on your installation.
Understanding the Wiring Diagram for a Chamberlain Garage Door Opener
A wiring diagram is vital for any electrical installation, including your Chamberlain garage door opener. It offers a visual map of connections and components, ensuring everything is properly connected and functions correctly. Understanding the diagram helps avoid mistakes during installation, making the process smoother and safer.
The wiring diagram for your Chamberlain garage door opener shows symbols for parts like the opener, sensors, wall control, and power source. These symbols represent the opener’s motor unit, sensors, and control connections, while lines show how each part is connected. Understanding these symbols makes the wiring process easier and helps prevent any confusion.
Color-coding is a key feature of the Chamberlain wiring diagram, helping identify different functions. For example, red and white wires may connect to the wall control unit, while black and white wires power the opener. Understanding these color codes ensures accurate connections, preventing wiring errors and electrical issues during installation.
Complete Guide on How to Wire a Chamberlain Garage Door Opener
Wiring a Chamberlain garage door opener might seem overwhelming, but with the right approach, it’s manageable. By following these simple steps on how to wire a Chamberlain garage door opener, you can ensure smooth operation and a professional installation.
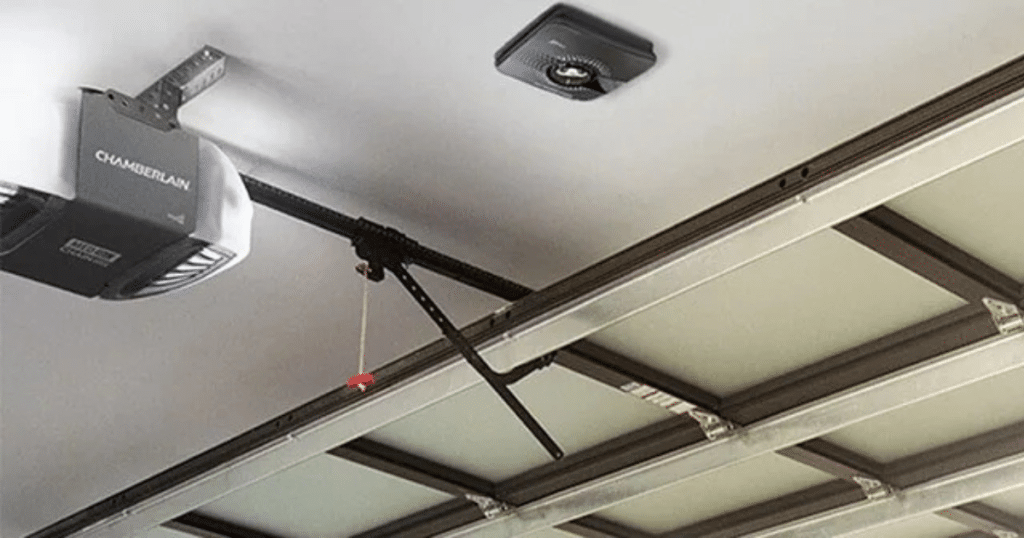
Step 1: Mount the Opener
Securely mount the garage door opener to the ceiling or wall, ensuring it’s level. Follow the manufacturer’s guidelines for proper height and alignment to prevent operational issues.
Step 2: Connect the Power Source
Plug the opener’s power cord into a grounded electrical outlet. Avoid using extension cords, as they can cause power fluctuations that may affect the opener’s performance.
Step 3: Wire the Wall Control
Attach the red and white wires from the wall control unit to their corresponding terminals on the opener. Mount the wall control at a convenient height for easy access.
Step 4: Install Safety Sensors
Install the safety sensors about 6 inches above the floor on each side of the garage door. Attach the sensor wires to the matching terminals on the opener.
Step 5: Set Up Remote Controls
Follow the user manual instructions to program your remote controls. Typically, this involves pressing a button on both the opener and the remote until the light flashes.
Step 6: Test the System
Once all connections are secure, test the garage door opener. Operate the door multiple times to check for smooth movement and listen for any unusual sounds.
By following these simple steps, you will be able to wire a Chamberlain garage door opener confidently, ensuring reliable performance and long-lasting efficiency.
Common Wiring Mistakes to Avoid
Installing a Chamberlain garage door opener requires attention to detail to avoid common mistakes. Being mindful of these errors will help you achieve a successful, efficient installation and prevent future issues.
- Loose Connections: Ensure all connections are tight to prevent power interruptions or system failure. Wrap exposed wires with electrical tape to prevent short circuits and ensure safety.
- Misinterpreting the Wiring Diagram: Follow the diagram carefully, especially the color codes, to avoid malfunction. Double-check wire connections to the correct terminals.
- Ignoring Sensor Alignment: Misaligned sensors can cause the door to malfunction. Use a level to align them and test by interrupting the beam to confirm proper operation.
By avoiding these common wiring mistakes, you can ensure that your Chamberlain garage door opener operates safely and efficiently.
Troubleshooting Common Wiring Issues
Troubleshooting common wiring issues with your Chamberlain garage door opener can save time and money. Fixing problems early ensures your opener runs smoothly and efficiently, avoiding unnecessary repairs.
1. Opener Not Responding to Remote Controls
This could be due to dead batteries, nearby device interference, or faulty connections. Replace the remote batteries and check for obstructions or interference, ensuring all connections are secure.
2. Door Not Closing Completely or Reversing Unexpectedly
Misaligned or obstructed sensors are often the culprit. Inspect the sensors, remove any blockages, and adjust their alignment to ensure they function correctly.
3. Inconsistent Operation or Unusual Noises
Power fluctuations or mechanical obstructions could cause this issue. Inspect the power source, clear any obstructions, and apply lubricant to moving parts for quiet and efficient operation.
By troubleshooting these common issues, you can maintain the performance of your Chamberlain garage door opener and avoid costly garage door repairs.
Safety Precautions When Working with Garage Door Openers
Safety should always be a top priority when working with garage door openers, as improper handling can lead to injuries or damage to the system. Following these safety precautions will help ensure a safe installation process.
Disconnect Power
Before beginning any wiring or maintenance, make sure to disconnect the opener from the power source. This prevents accidental activation and reduces the risk of electrical shock.
Use Safety Gear
Put on safety glasses and gloves to safeguard your eyes and hands. A hard hat may be needed if working in high-risk areas.
Follow Manufacturer Instructions
Follow the instructions from Chamberlain for your specific model. These guidelines ensure the safe and proper installation of your garage door opener.
Work with a Partner
Having a partner helps when handling heavy parts or working on a ladder. They can hold parts in place while you secure them.
Test Safety Features
After installation, test safety features like auto-reverse. Ensuring they work prevents accidents and ensures the opener operates correctly.
By prioritizing safety and following these precautions, you can confidently install and maintain your Chamberlain garage door opener without compromising your well-being.
Maintenance Tips for Your Chamberlain Garage Door Opener
Regular maintenance is essential for maintaining the durability and efficiency of your Chamberlain garage door opener. By following these maintenance tips, you can keep your opener in top condition and extend its lifespan.
1. Inspect and Lubricate Moving Parts
Check the opener’s moving parts for wear. Use premium lubricant on the rollers, hinges, and tracks to ensure smooth operation and reduce noise.
2. Test Safety Features Frequently
Regularly test safety features like auto-reverse. This ensures the opener is functioning correctly and helps maintain safety.
3. Check for Loose Hardware
Vibrations may loosen nuts and bolts. Inspect all hardware regularly and tighten any loose parts to prevent issues.
4. Replace Batteries as Needed
Replace remote control batteries annually or when needed. Regularly test remotes to ensure they work properly.
5. Clean the Sensors
Dust can block safety sensors. Clean them with a soft cloth regularly to ensure they perform properly.
By implementing these maintenance practices, you can keep your Chamberlain garage door opener running smoothly and efficiently for years to come.
FAQs
How do I wire the safety sensors for a Chamberlain garage door opener?
Wiring the safety sensors for a Chamberlain garage door opener involves connecting the two sensor wires to the terminals on the opener motor unit. Ensure the sensors are aligned properly for optimal safety performance.
How do I connect the Chamberlain garage door opener to a wall switch?
To wire the Chamberlain garage door opener to a wall switch, connect the two wires from the wall switch to the terminals marked for wall control on the opener. Make sure the switch is installed within convenient reach, typically near the door.
Can I wire a Chamberlain garage door opener to work with my smart home system?
Yes, you can wire a Chamberlain garage door opener to work with a smart home system by connecting it to the MyQ Smart Garage Hub. This will allow you to control your garage door opener remotely through your smartphone or smart home assistant.
What voltage is required to wire a Chamberlain garage door opener?
A Chamberlain garage door opener typically operates on 120V AC for the motor and 24V DC for the safety sensors. Always verify the specific voltage requirements listed in the product manual before wiring.
Conclusion
Wiring a Chamberlain garage door opener might seem daunting at first, but with the right approach, it can be a manageable task. By following this guide on how to wire a Chamberlain garage door opener, you can install it confidently and avoid common installation mistakes. Taking the time to understand the wiring diagram ensures a smooth and safe setup.
Once your installation is complete, remember that safety is key. Regular maintenance and adherence to safety protocols will help prolong the life of your garage door opener. If you encounter any challenges, don’t hesitate to reach out to experts for professional garage door repair in Richmond, TX, and ensure everything works flawlessly.
Now that you’ve learned how to wire a Chamberlain garage door opener, you’re ready to get started. Gather the necessary tools, follow the guide step by step, and enjoy the convenience of a properly installed garage door system. If you need further assistance, First Call Garage Doors is here to help!
End Note
If you’re looking for top-notch garage door services, First Call Garage Doors is your go-to choice. From professional garage door installation to garage door repair, we offer comprehensive solutions to meet your needs. Check out our complete Garage Services to learn more about what we can do for you.
We specialize in garage door maintenance to keep your system running smoothly. Need a new opener? Our new garage door opener replacement service has you covered. Plus, if your opener is malfunctioning, our expert garage door opener repair will get it back in action quickly and safely.
Learn more about our goal through our About Us section and explore our gallery to see our impressive work and satisfied customers. We serve various areas, check on our service areas page, as we are dedicated to providing the best service possible. For more helpful tips, check out our blog posts or follow us on Instagram and Linktree for updates and promotions!. Ready to get started? Contact us today to experience the best in garage door services!
First Call Garage Doors
20527 FM 1093 Unit B205, Richmond, TX 77407, United States
+17132482684